
Creating a Google Business Profile is one of the most powerful ways to get your business discovered online. Whether you run a service-based company, a brick-and-mortar store, or an e-commerce brand, this guide will walk you through every step with actual screenshots so you know exactly what to expect.
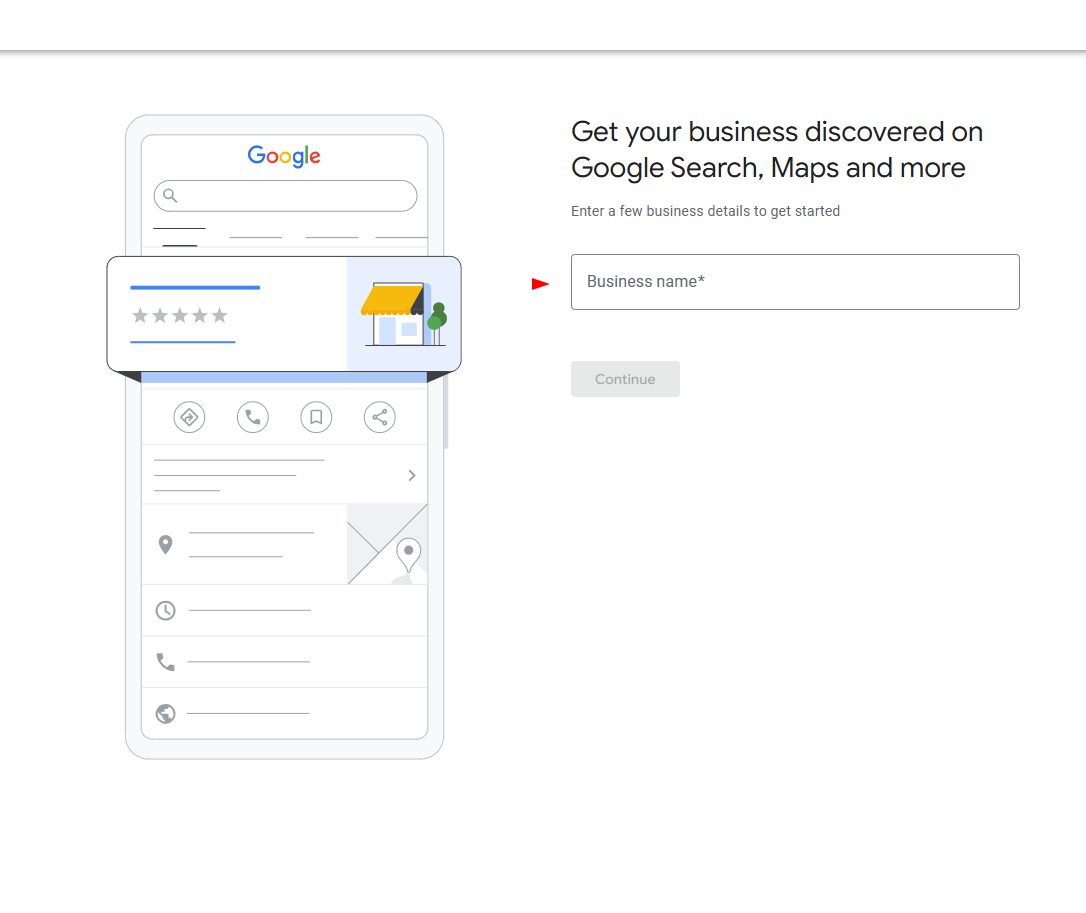
Step 1: Enter Your Business Name
Start by visiting Google Business Profile Manager. You’ll be asked to enter your business name. Be sure to use the name that customers commonly search for — typically your brand or storefront name.
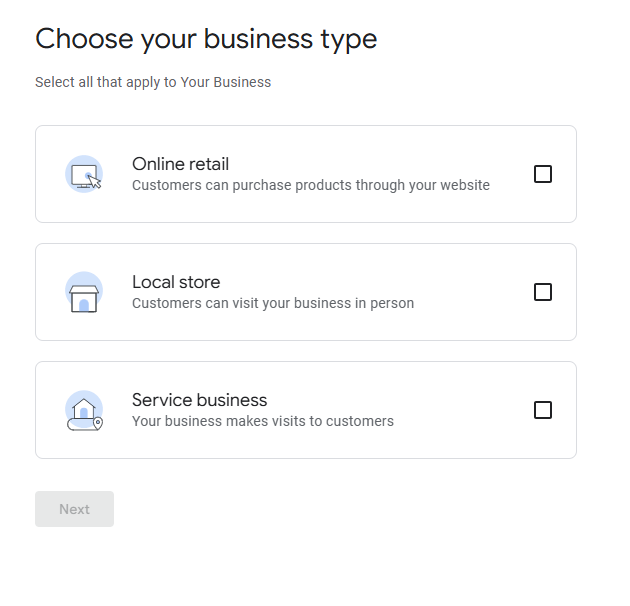
Step 2: Choose Your Business Type
Next, you’ll need to select how your business operates. You can choose one or more of the following options: Online retail if you sell products online, Local store if customers visit your physical location, or Service business if you visit customers at their location.
Step 3: Add Your Website
All businesses, regardless of type, have the option to add a website. If you already have one, entering your website URL is highly recommended as it gives potential customers a direct way to learn more, contact you, or make purchases. This step is optional, and you can skip it and come back later if needed. If you selected "Online retail," Google will prompt you to enter your website URL. This step is optional, but entering your website is highly recommended as it gives potential customers a direct way to browse and buy from you.

Step 4: Choose a Business Category
Google uses business categories to match your profile with relevant searches. Begin typing keywords to search for your industry and select the most accurate category. While you can add more categories later, your primary category should be the one that best defines your main offering.
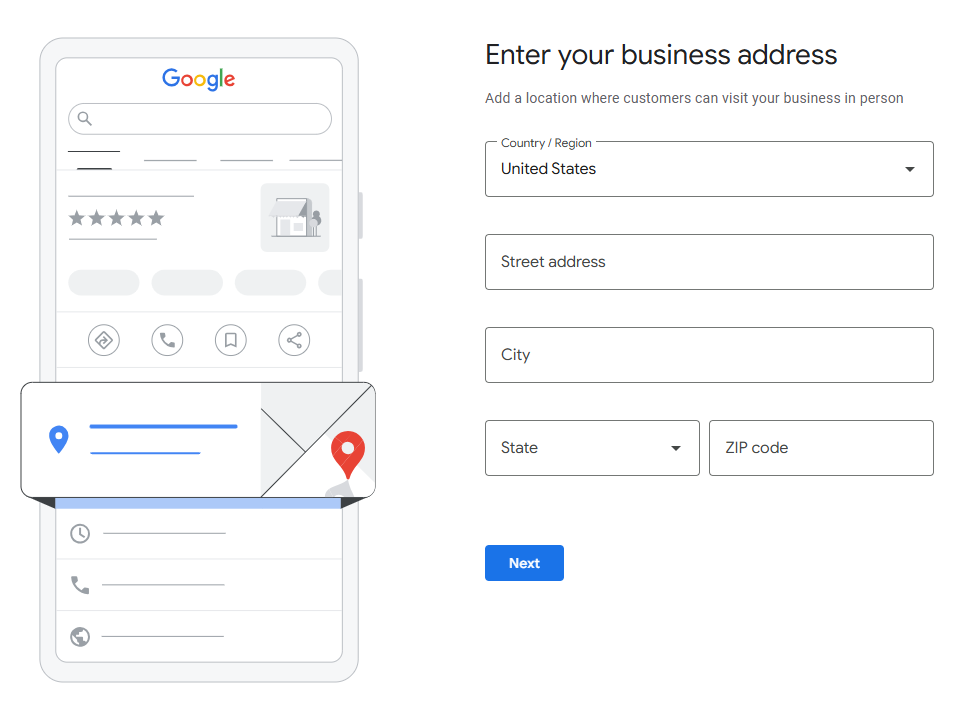
Step 5: Enter Your Business Address
If your business has a storefront or office location that customers can visit, you'll need to input your full address. This ensures that your business appears correctly on Google Maps and in local search results. If you're a service-based business without a customer-facing location, you may have the option to hide your address.
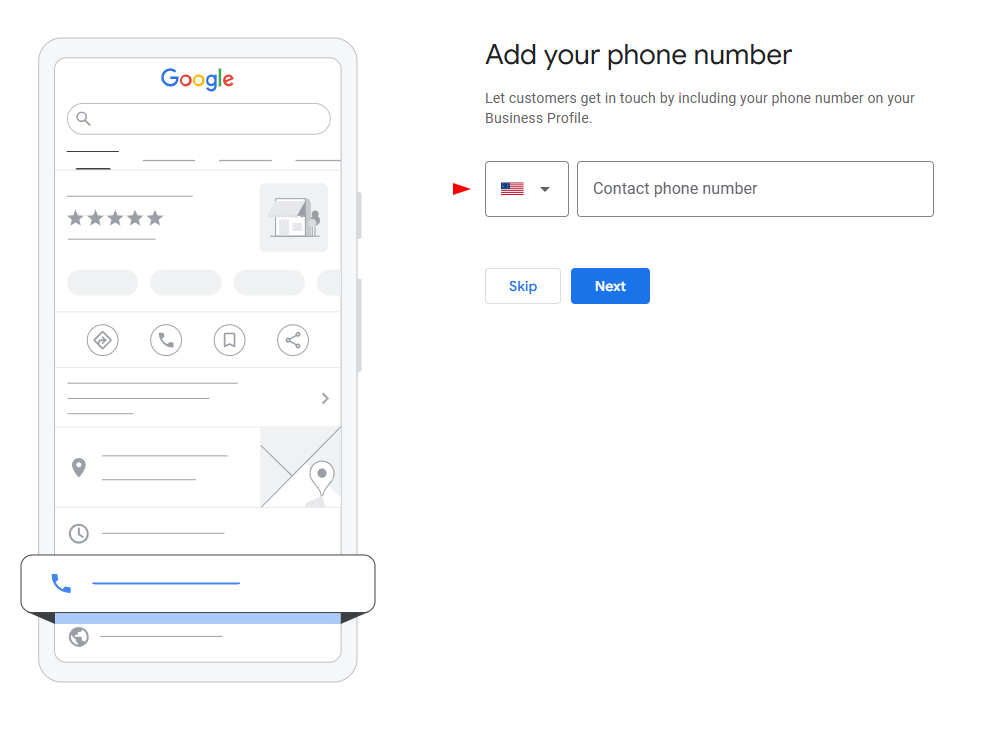
Step 6: Add a Contact Phone Number
Enter a phone number that customers can use to contact you. This helps improve trust and gives users a quick way to reach your business. If you’d rather not include this for now, you can skip it and add it later in your business dashboard.
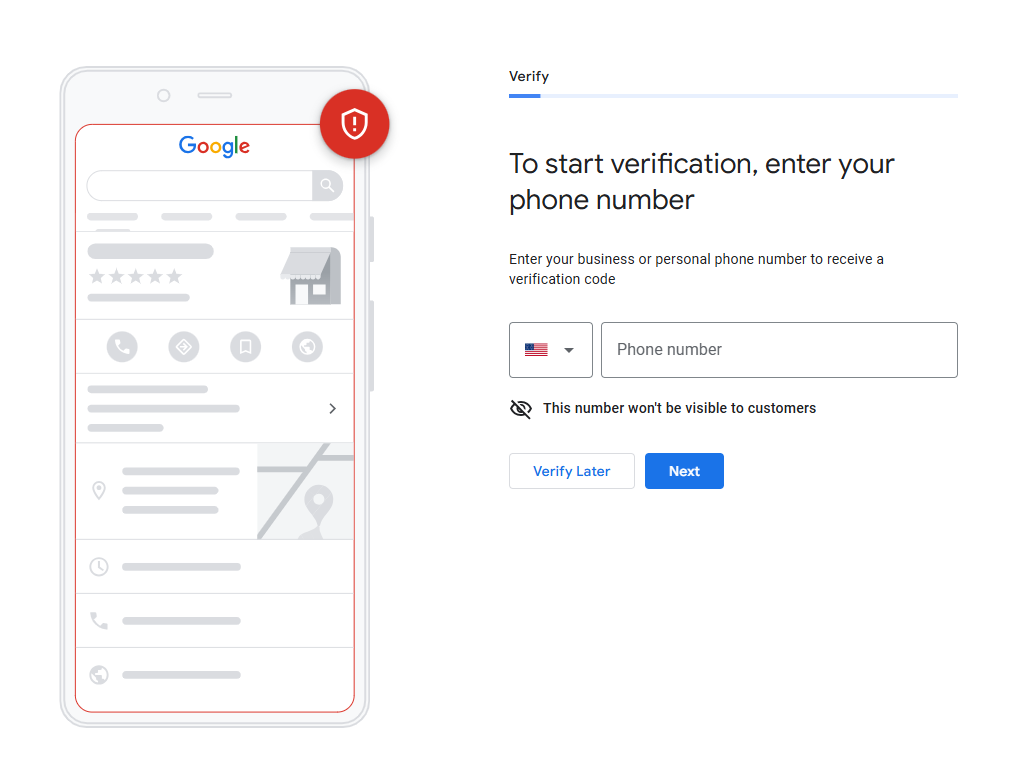
Step 7: Verify Your Business
To ensure that you're the rightful owner of the business, Google requires verification. You’ll be asked to provide a phone number to receive a verification code via call or text. This phone number is only used for verification and will not be visible to the public.
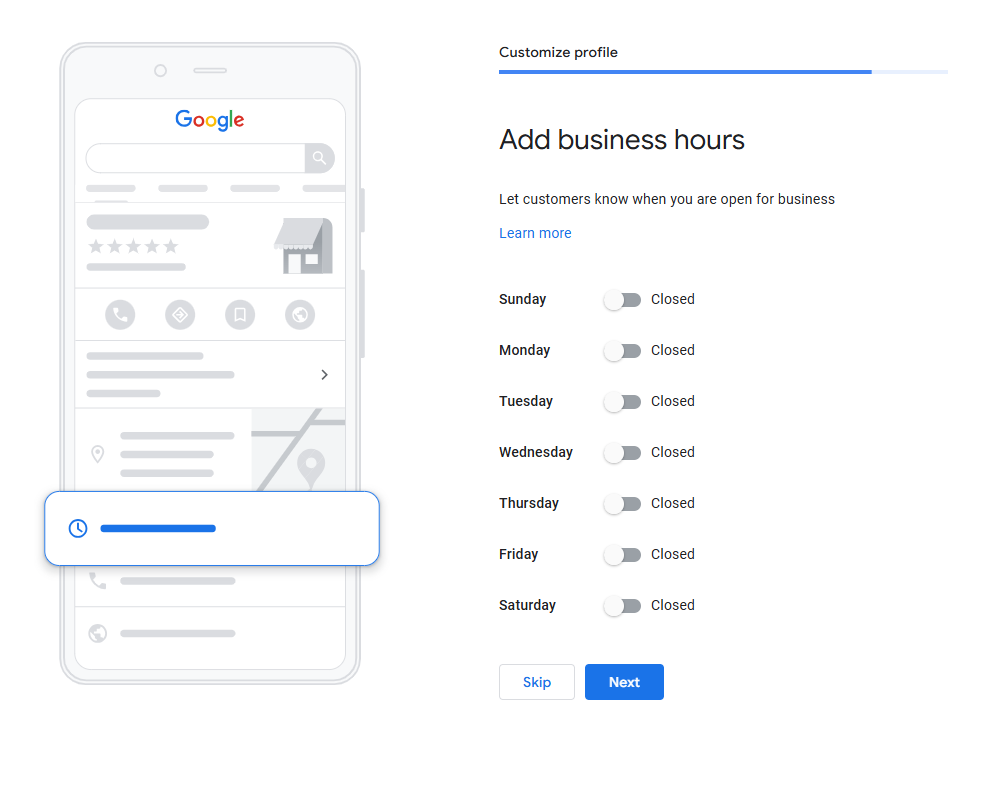
Step 8: Set Your Business Hours
Now it’s time to let customers know when your business is open. Toggle each day of the week on or off, and enter your business hours accordingly. Keeping your hours accurate helps prevent negative experiences from customers arriving when you're closed.
Step 9: Add a Business Description
In this section, you can describe your business and tell customers who you are, what you offer, and what sets you apart. Keep your message clear and informative rather than overly promotional. The limit is 750 characters, so be concise but meaningful.

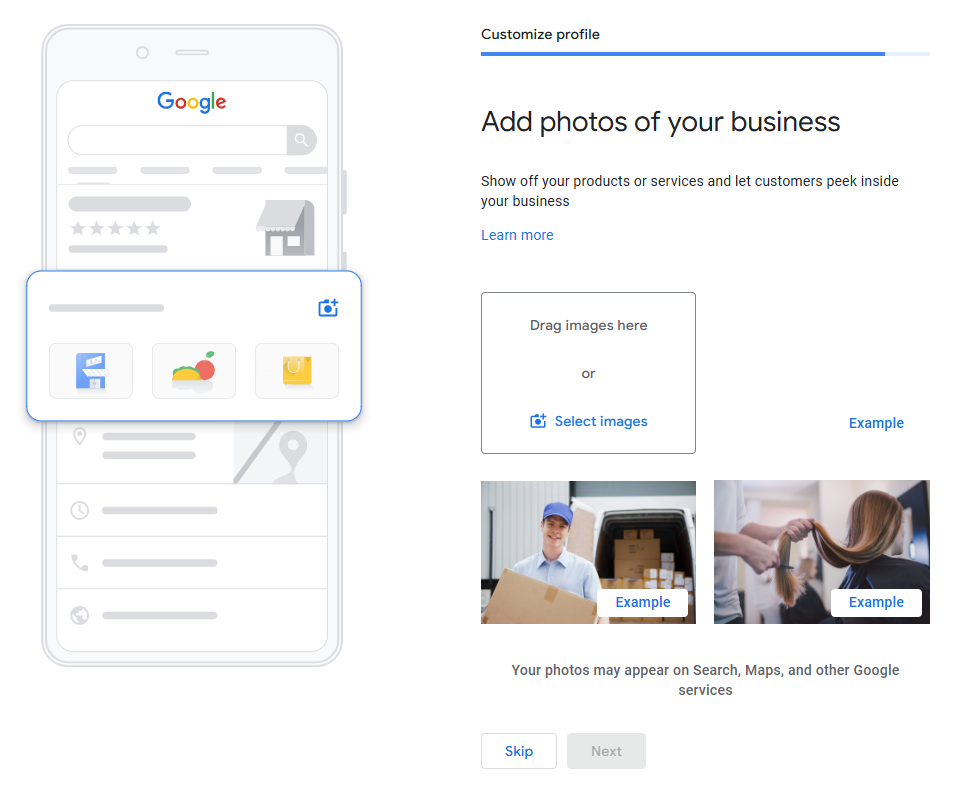
Step 10: Upload Photos of Your Business
Adding photos is a great way to build trust with potential customers. Upload images of your storefront, team members, services, or products to make your listing more attractive. High-quality visuals can increase engagement and help you stand out.
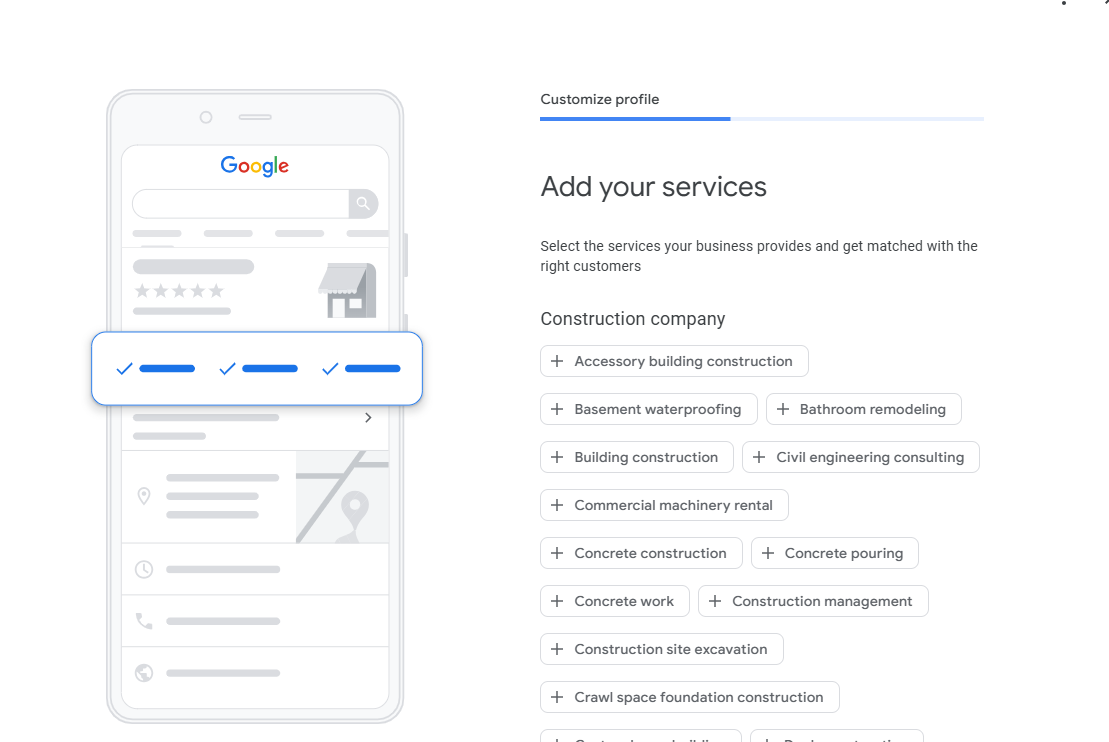
Step 11: Add Your Services (If Applicable)
If your business is service-based, you may be prompted to add the services you provide. This helps Google match your business with relevant customer searches. You’ll see a list of commonly offered services based on your business category. You can click to add relevant services now, or skip and add them later by editing your profile.
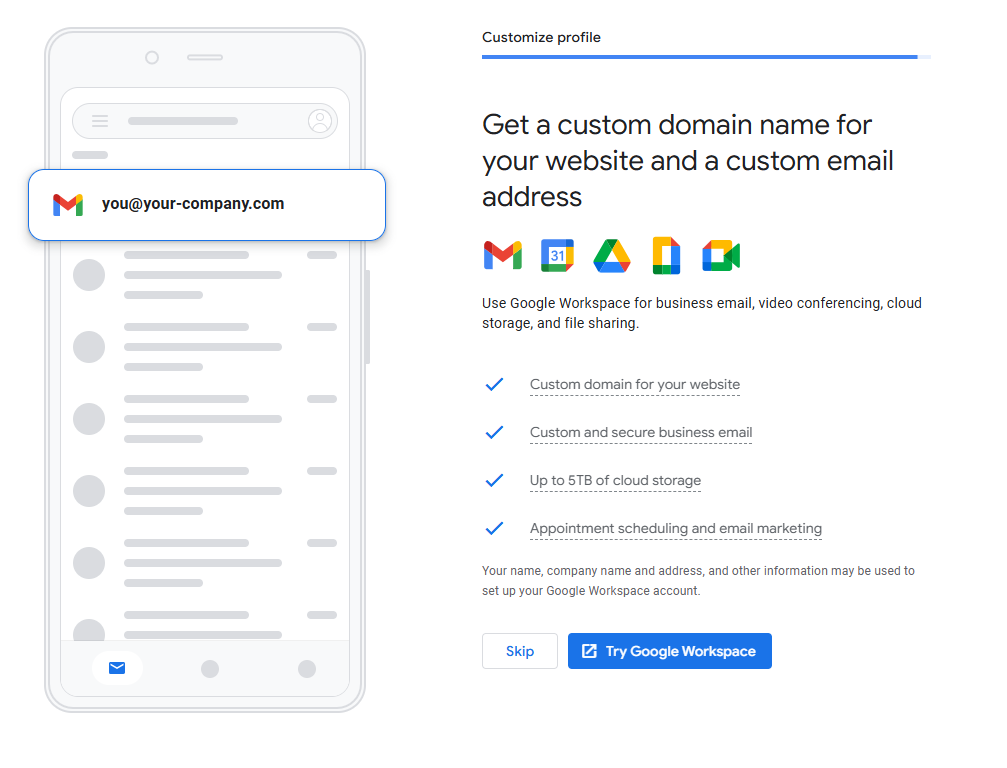
Step 12: (Optional) Set Up a Custom Email & Domain
At this stage, Google may offer you the option to create a professional email address using Google Workspace (e.g., info@yourbusiness.com). While not required, this can elevate your brand’s credibility.
Step 13: (Optional) Claim a Google Ads Credit
If you're ready to start advertising, you may be eligible for up to $500 in free ad credits. This is a great way to boost your visibility without any upfront ad spend.

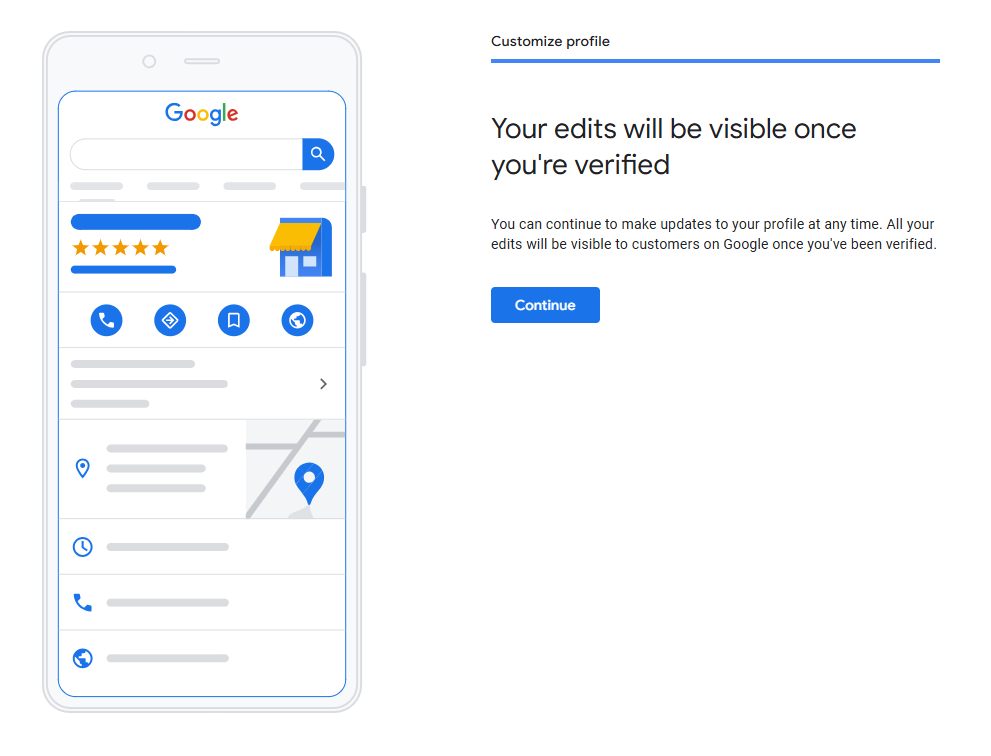
Step 13: Profile Pending Verification
Once you complete all the steps, you’ll receive a message letting you know that your edits will go live once your business is verified. You can continue to edit your profile in the meantime.
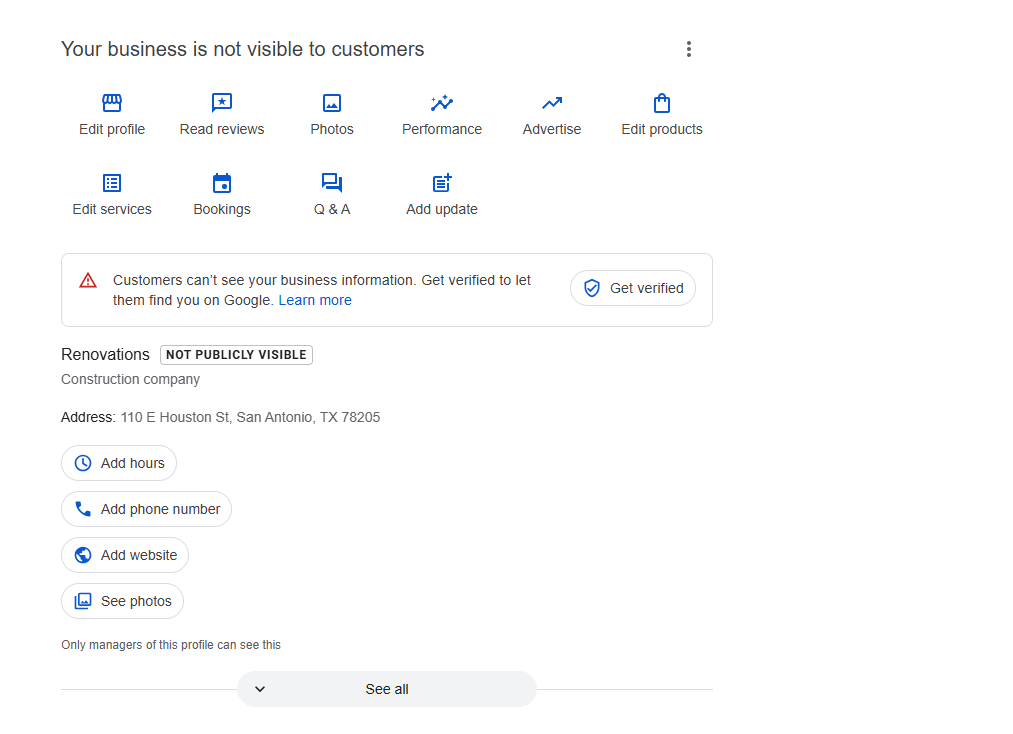
How to Make Ongoing Edits to Your Profile
Once your profile is created, managing and updating it is simple. You can edit various parts of your Google Business Profile directly from your Google Search or Maps dashboard. Just search for your business name while logged into your Google account, and you’ll see management options appear above your business listing.
From here, you can:
- Edit your profile – Update your name, category, description, and contact info.
- Add or update business hours – Keep your hours accurate for holidays and seasonal changes.
- Upload new photos – Refresh your visuals to keep your profile engaging.
- Add or edit services – Expand your offerings or tailor them more precisely to your audience.
- Post updates – Share announcements, promotions, and events directly to your profile.
- Respond to reviews – Show appreciation for customer feedback and resolve concerns.
You can access these tools any time—even while waiting for verification. Just remember, your profile won’t be publicly visible until it's verified.
Final Thoughts
Setting up your Google Business Profile properly ensures your customers find accurate, helpful, and engaging information when searching online. It builds trust, drives foot traffic, and supports your SEO. Once you’re verified, your business will show up across Google Search and Maps — so make sure your info is up-to-date and take advantage of this free, powerful tool.
Ready to grow your local visibility? Get verified, stay active, and keep your listing fresh with new photos, updates, and customer interactions.